Getting Started
Install Open Worship and get your first service running in minutes.
Download & Install
Windows
- Download Open-Worship-1.0.0-Setup.exe
- Run the installer and follow the prompts
- Launch Open Worship from the Start Menu
Windows may show a SmartScreen warning since the app isn’t code-signed. Click More info → Run anyway.
macOS
- Download Open-Worship-1.0.0.dmg
- Open the DMG and drag Open Worship to Applications
- Right-click the app → Open (first time only, to bypass Gatekeeper)
Linux
- Download Open-Worship-1.0.0.AppImage
- Make it executable:
chmod +x Open-Worship-1.0.0.AppImage - Run it:
./Open-Worship-1.0.0.AppImage
Or install the .deb package on Debian/Ubuntu:
sudo dpkg -i open-worship_1.0.0_amd64.deb
First Launch
When you open Open Worship for the first time, you’ll see three main sections:
| Section | Purpose |
|---|---|
| Library | Manage your song collection |
| Present | Run live presentations |
| Settings | Configure output, fonts, colors, NDI |
Add Your First Song
- Click Library in the sidebar
- Click + Add Song
- Enter the song title
- Add lyrics in the content area
Formatting Tips
Use section markers to organize your lyrics:
[Verse 1]
Amazing grace, how sweet the sound
That saved a wretch like me

[Chorus]
I once was lost, but now am found
Was blind, but now I see
Supported markers:
[Verse 1],[Verse 2], etc.[Chorus][Bridge][Pre-Chorus][Outro][Tag]
Create a Schedule
- Click Present in the sidebar
- Click ← Back to Schedules
- Create a new schedule (e.g., “Sunday Service”)
- Click Add to Schedule on songs from your library
Your schedule will appear in the Present view, ready for the service.
Go Live
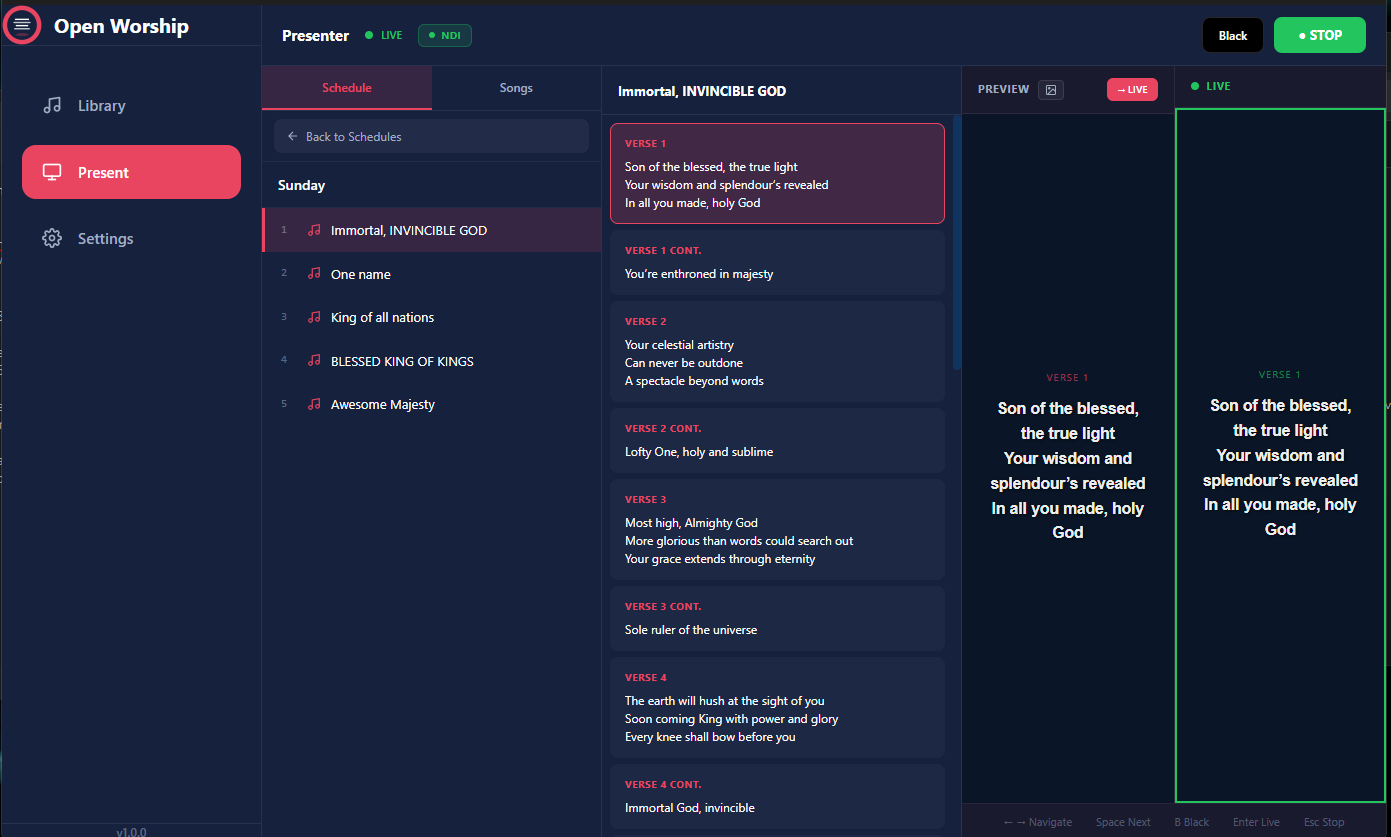
- Select your schedule in the Present view
- Click a song to open it
- Click any verse in the center panel to preview it
- Press Enter or click → LIVE to send to output
- Use Space to advance to the next slide
Controls
| Control | Action |
|---|---|
| Space | Next slide |
| ← / → | Previous / Next slide |
| B | Black screen |
| Esc | Stop live output |
See Keyboard Shortcuts for the full list.
Configure Settings
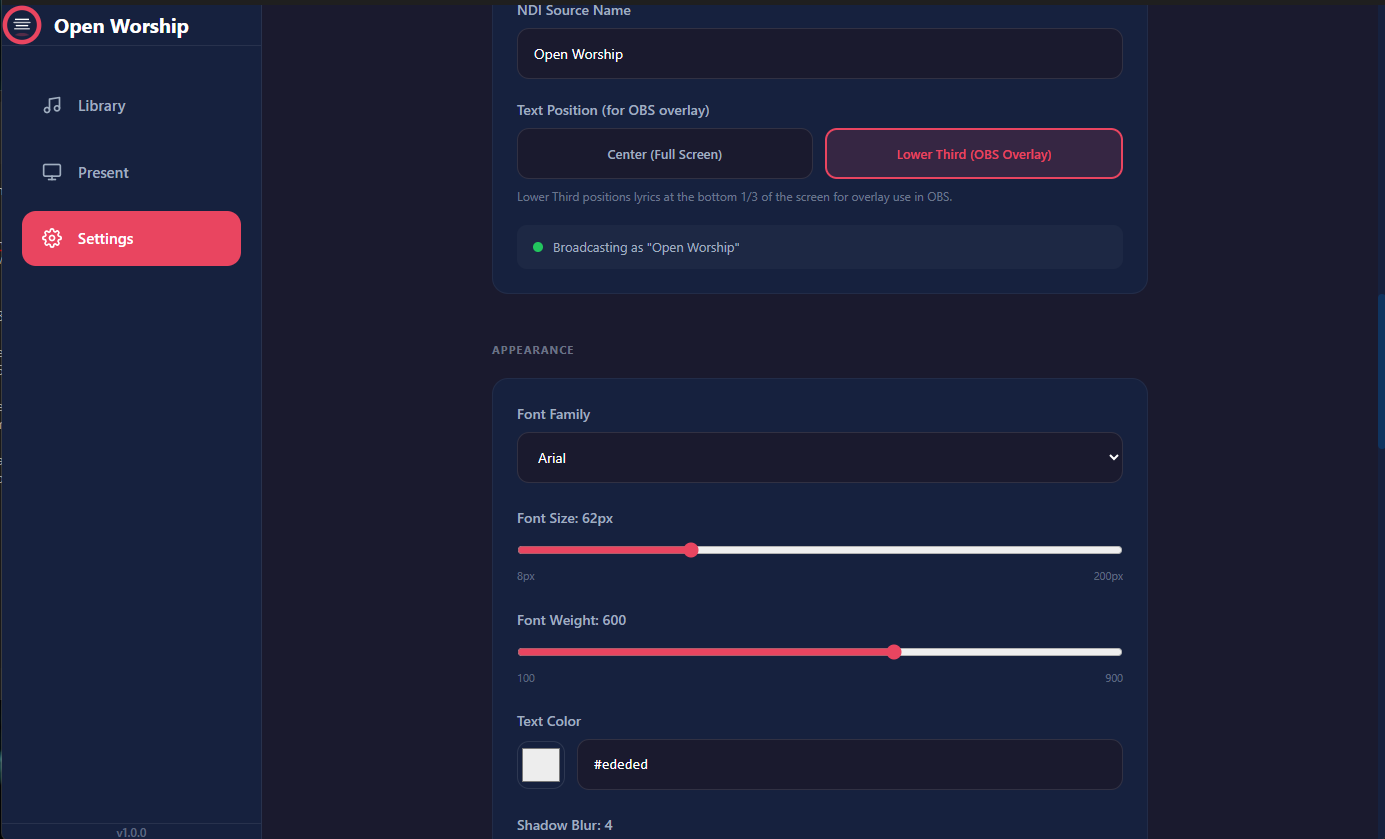
Click Settings to customize:
Appearance
- Font Family — Choose your display font
- Font Size — Adjust for your screens (default: 62px)
- Font Weight — Light to bold
- Text Color — White works best on dark backgrounds
NDI Output
- Enable NDI — Broadcast lyrics over NDI for OBS/vMix
- Source Name — Identifies your output on the network
- Text Position — Center (full screen) or Lower Third (OBS overlay)
See NDI & OBS Setup for livestream integration.
Next Steps
- User Guide — Explore all features
- Adding Songs — Import and organize your library
- NDI & OBS Setup — Set up livestream overlays
- Keyboard Shortcuts — Master the controls